To pose naturally while sitting in a chair, perch on the forward third of the seat, angle your torso slightly away from the camera, and keep your limbs separated from your body to create clean, flattering visual lines. By shifting your weight, engaging your core, and giving your hands intentional placement, you turn a basic piece of furniture into a versatile framing tool for portraits, professional headshots, or casual photography.
Key Takeaways
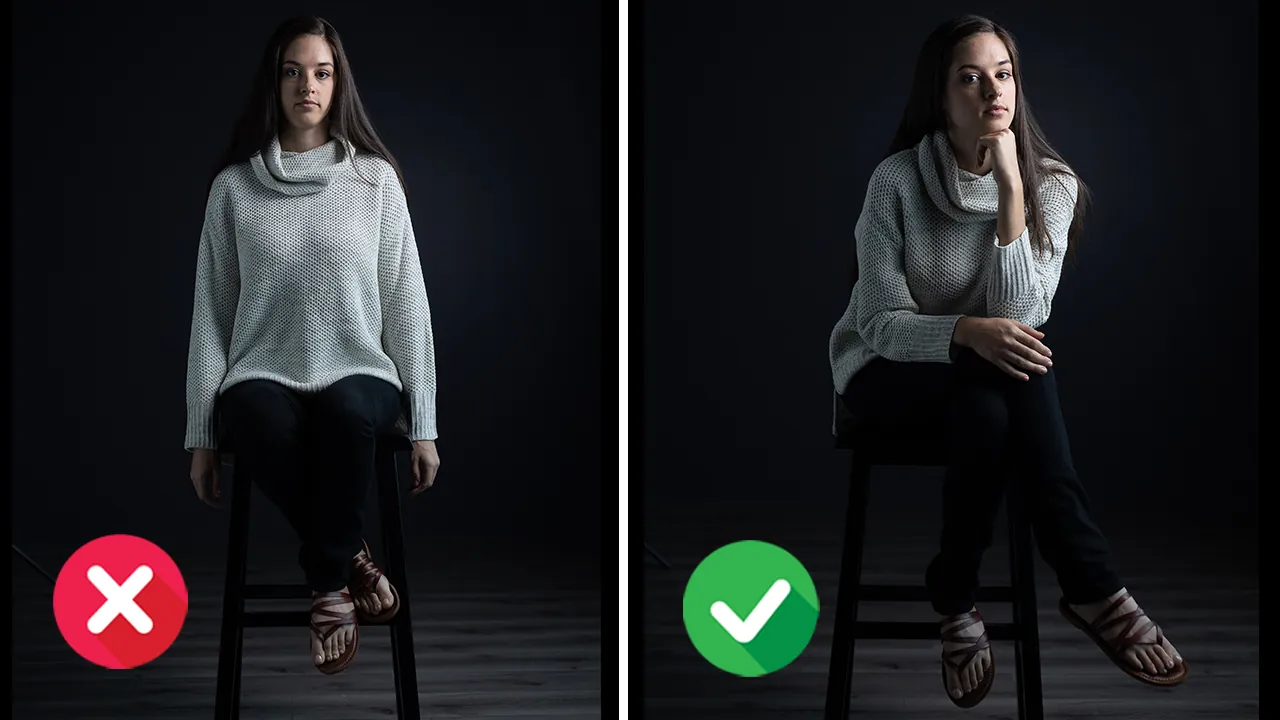
- Perch near the front edge of the seat cushion to prevent slouching and leg compression.
- Create triangles with your arms and legs to add depth and eliminate static symmetry.
- Angle your hips roughly 30 to 45 degrees away from the lens rather than sitting square.
- Keep hands relaxed with soft fingers; never press clenched fists into your face or thighs.
- Rest your weight on the back hip to allow your front leg to extend and elongate your frame.
How to Pose Sitting in a Chair
Great seated portraits rely on intentional geometry rather than passive lounging.
Pro Tip: Avoid resting your full body weight on the backrest; treating the chair like an active stool instantly improves spinal elongation and sharpens your jawline definition.
| Pose Style | Primary Edge Position | Best Camera Angle | Target Mood |
|---|---|---|---|
| Executive Lean | Back half, upright | Eye level, 15° off-center | Authority, confidence |
| Casual Perch | Front third edge | Slightly elevated | Approachable, relaxed |
| Crossed Ankle Stretch | Middle of seat | Low angle | Elongated, editorial |
| Side Saddle Profile | Turned 90° over armrest | Direct profile or 45° | Creative, candid |
Where Should Your Legs Go?
Leg placement establishes the entire base of your composition. Planting feet flat facing the camera creates a blocky silhouette that shortens your lower half.
Instead, stagger your feet by bringing one back toward the chair while extending the other forward.
- The Ankle Cross: Cross your legs at the ankles, extend your heels forward, and rest your weight on your outer foot edges.
- The High Knee Fold: Cross one knee over the other, pointing your top toe downward to maintain calf muscle contouring.
- The Wide Stance: Place feet shoulder-width apart, rest forearms on your knees, and lean your torso forward.
- The Runner T-Step: Tuck your back foot beneath the chair rung while your lead foot points toward the photographer.
Warning: Don’t press the underside of your thighs firmly down onto the edge of a hard seat, as this spreads the thigh tissue toward the camera and exaggerates leg width.
Mastering Hand and Arm Placement
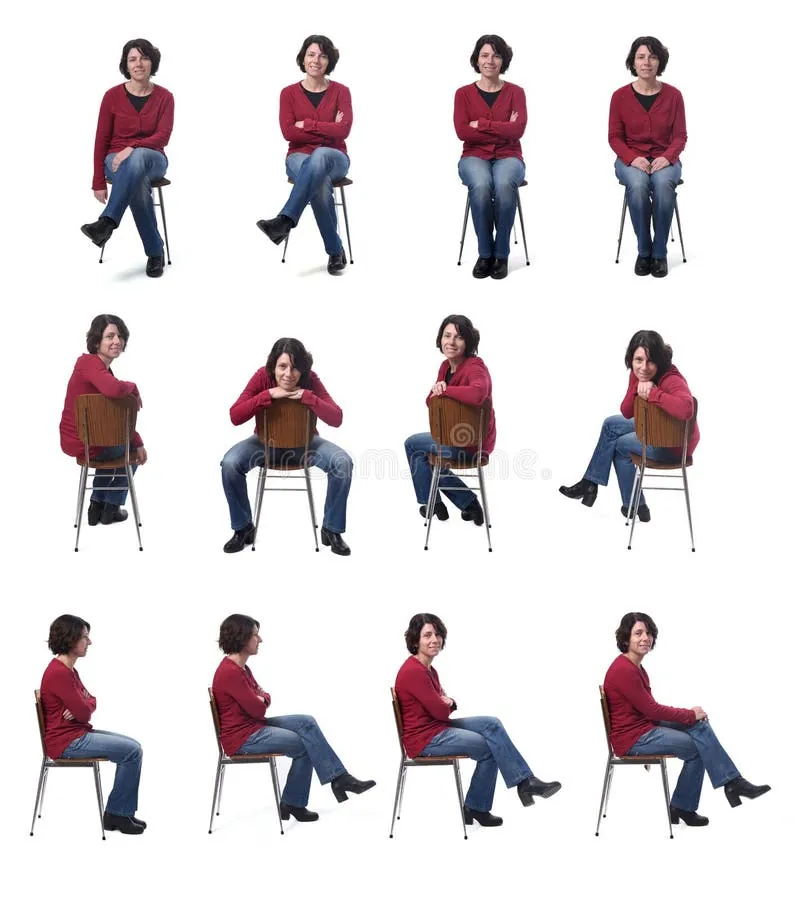
Empty or clenched hands quickly ruin an otherwise solid seated pose.
Aim to form open triangles between your arms and your torso. Pull your elbows outward to create space between your waist and arms, emphasizing your natural waistline.
Resting on Armrests
Rest your forearms lightly on the armrests rather than dropping your full weight onto your elbows. Raise your wrists slightly and let your fingers curl naturally inward toward your thighs.
Touching the Face
When posing near the head, graze your fingers along the lower jawline or rest a curved finger under the chin. Never push your fist or palm into your cheek, which distorts facial skin.
What Chair Types Work Best?
Different chairs demand distinct posing mechanics. A wide lounge chair swallows your frame, while a firm dining chair supports clean, upright lines.
| Chair Type | Common Posing Pitfall | Correct Technique |
|---|---|---|
| Armless Dining Chair | Stiff, rigid shoulders | Twist torso, hook one arm over the spindle backrest |
| Swivel Office Chair | Uncontrolled rotation | Plant balls of feet, lean forward on sturdy armrests |
| Deep Velvet Armchair | Slouching into cushions | Perch on forward edge, cross ankles via extended leg line |
| Low Wooden Stool | Rounded lower back | Hinge at hips, rest elbows lightly on raised knee |
Creating Dynamic Angles With Your Torso
Facing the lens straight-on makes your shoulders and waist appear widest. Rotating your torso introduces depth and perspective.
Turn your hips 30 to 45 degrees away from the camera while twisting your chest toward the lens. This twist defines the waist and creates flattering dimensions under studio lighting. Tip your chin downward and push your forehead forward to eliminate shadows under the chin.
Pro Tip: Inhale deeply to expand your ribs, roll your shoulders backward, and exhale gently while holding your muscular core engagement steady right before the shutter clicks.
Common Seated Posing Mistakes to Avoid
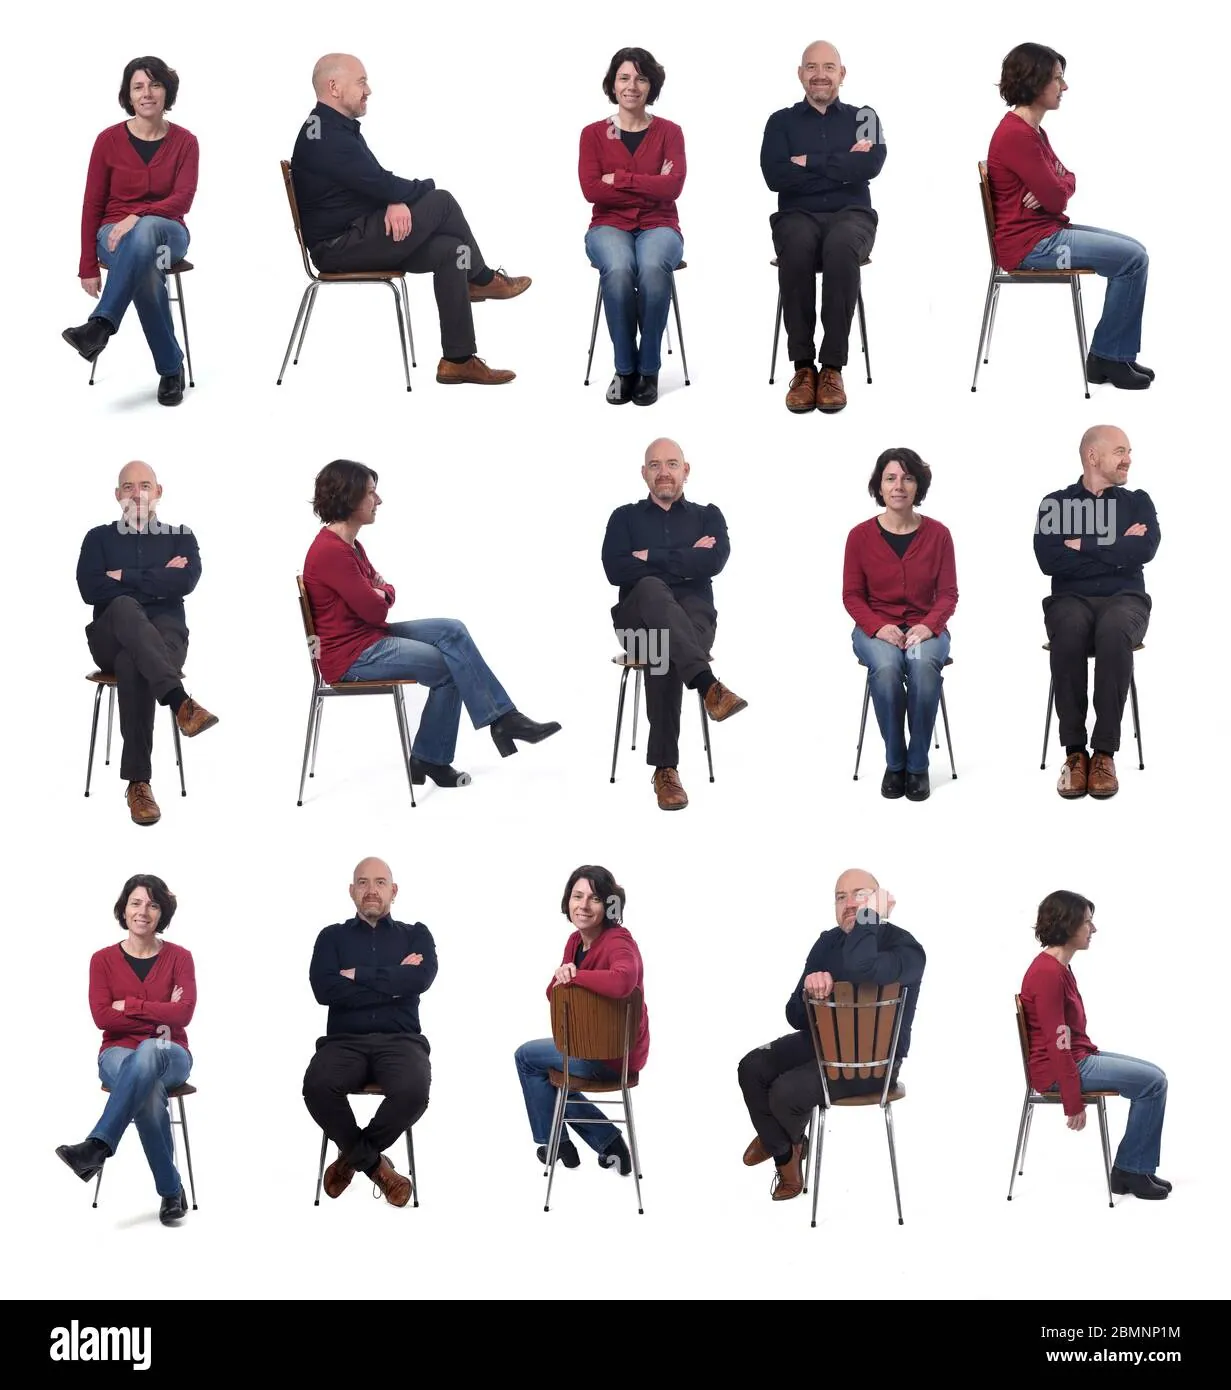
Even experienced subjects fall into standard seated traps that detract from the final image.
- Slumping back against the rear support, which creates visible midsection folds.
- Clenching fingers into tight fists, hiding the fingers and presenting a blunt knuckle profile.
- Pressing both feet flat side-by-side, which results in static limb placement.
- Pushing the elbows straight backward, hiding your forearms and creating an amputated limb truncation effect.
- Dropping the chin flat toward the chest, which obscures natural neckline separation.
Related guides
Frequently Asked Questions
How do I avoid a double chin when sitting?
Extend your neck upward, push your forehead forward toward the lens, and tilt your chin slightly downward. This motion tightens the skin beneath your jawline.
What should I do with my hands if the chair has no arms?
Rest your hands on your thighs, clasp them over your knee, or drape one arm across the chair back. You can also touch a lapel, adjust a cuff, or lightly support your jaw to keep your hands looking natural and purposeful.
How can I make my legs look longer in a chair?
Sit on the edge, angle your body, and extend your front leg toward the camera corner with toes pointed down. Elevating your heels slightly lifts the calves and creates an unbroken, extended visual line.
Should I lean back or lean forward in photos?
Leaning slightly forward conveys warmth, engagement, and energy, making it ideal for business portraits and headshots. Leaning backward projects ease, but requires resting on your back hip and extending your legs to avoid looking sloppy.
What is the best angle for a seated photo?
A three-quarters angle is universally flattering. Position your chair at a 45-degree angle to the photographer, then rotate your upper torso toward the lens.
How do I pose casually without looking stiff?
Avoid rigid symmetry by varying limb heights and angles. Drop one shoulder slightly lower than the other, bend one knee more than the other, and keep your mouth relaxed with parted lips.
Conclusion
Find a sturdy, armless chair, place a full-length mirror or phone tripod about six feet away at chest height, and run through these forward-perch and angled-foot adjustments to build muscle memory before your next photo shoot.