Posing while sitting down on a chair requires a balance of spinal alignment, intentional limb placement, and an awareness of how fabric interacts with your frame. To achieve a flattering look, you must avoid sinking into the furniture, which typically causes slouching and unflattering skin bunching. Instead, focus on keeping your weight toward the front edge of the seat, which naturally engages your core muscles and keeps your posture upright and elegant for the camera.
Key Takeaways
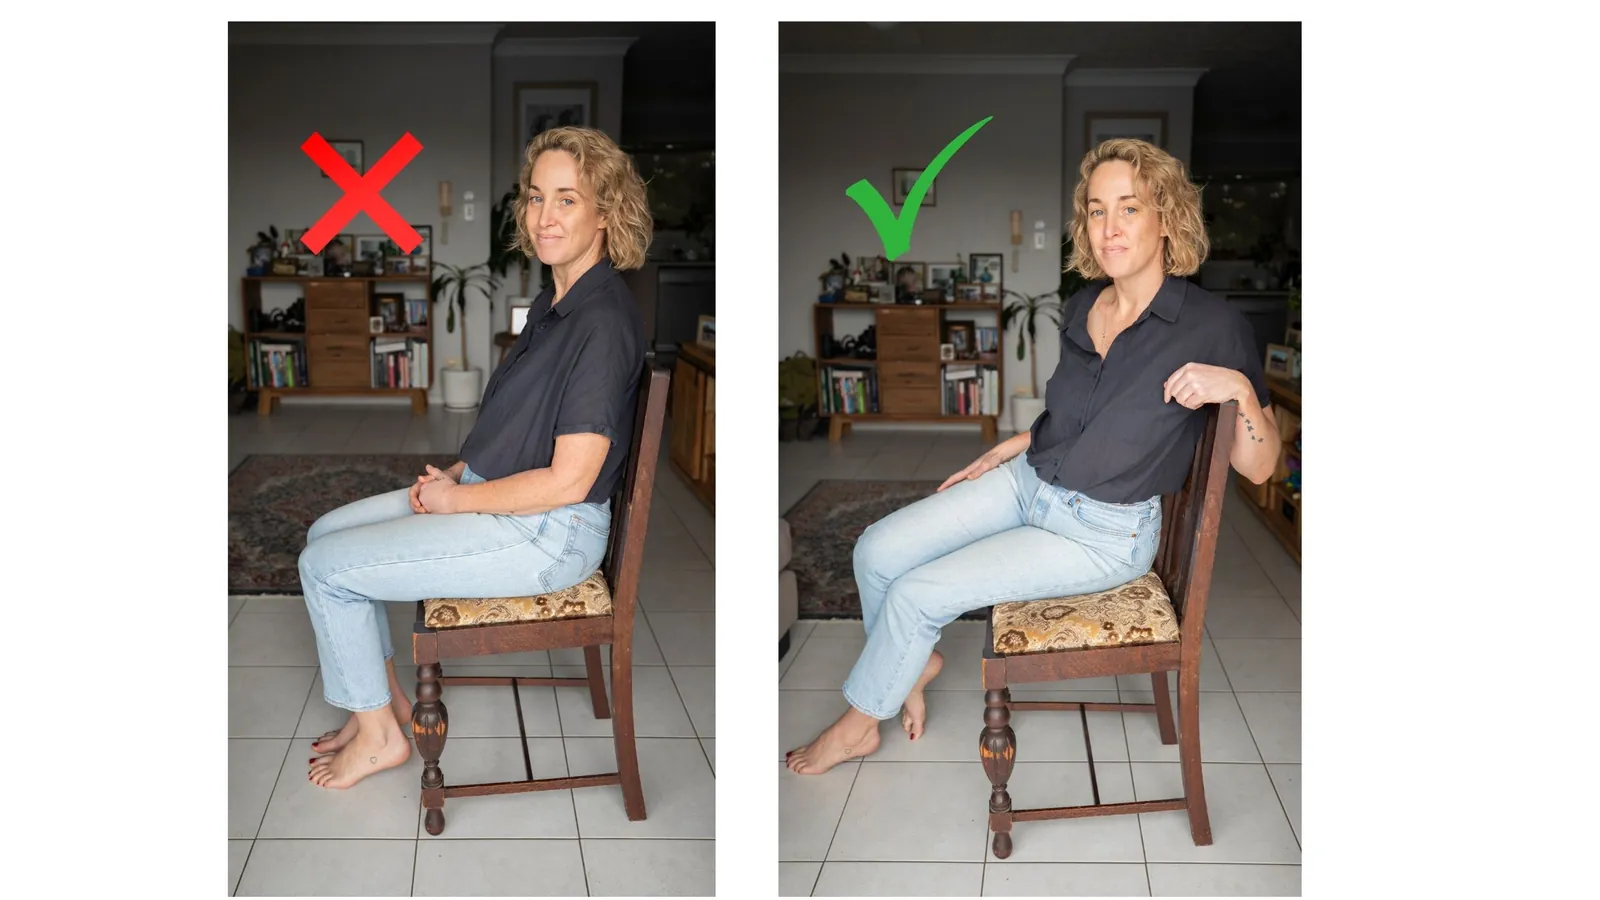
- Always shift your weight to the front third of the seat to maintain a long, lean line.
- Avoid crossing your legs tightly, as this distorts the shape of your thighs and calves.
- Keep your feet active; pointing your toes or lifting your heels creates visual length.
- Use your arms to create negative space between your torso and your limbs to define your shape.
- Angle your body slightly away from the camera lens to create a more dynamic, slimming silhouette.
How to Pose Sitting Down Properly
Mastering the art of sitting requires an understanding of how your body occupies space. When you sit fully back against a chair, your torso often loses its definition. By moving to the edge of the seat, you gain the freedom to shift your weight and angle your hips. This movement is the foundation for almost every professional portrait or fashion shot involving a chair.
Managing Your Lower Body
Your legs are the most difficult part of a seated pose because they tend to flatten against the seat cushion. To prevent this, never press your full weight down. Instead, hover slightly or keep your weight on one hip. You can find more information on maintaining neutral spinal alignment to ensure that your seated posture remains healthy and photogenic during long sessions.
| Technique | Effect on Silhouette | Best For |
|---|---|---|
| Feet Crossed at Ankles | Elongates the legs | Formal portraits |
| One Leg Tucked Under | Creates a relaxed vibe | Lifestyle photography |
| Knees Pointed Away | Slims the upper thighs | Fashion editorials |
| Feet Flat on Floor | Provides a grounded look | Professional headshots |
Creating Lines With Your Arms
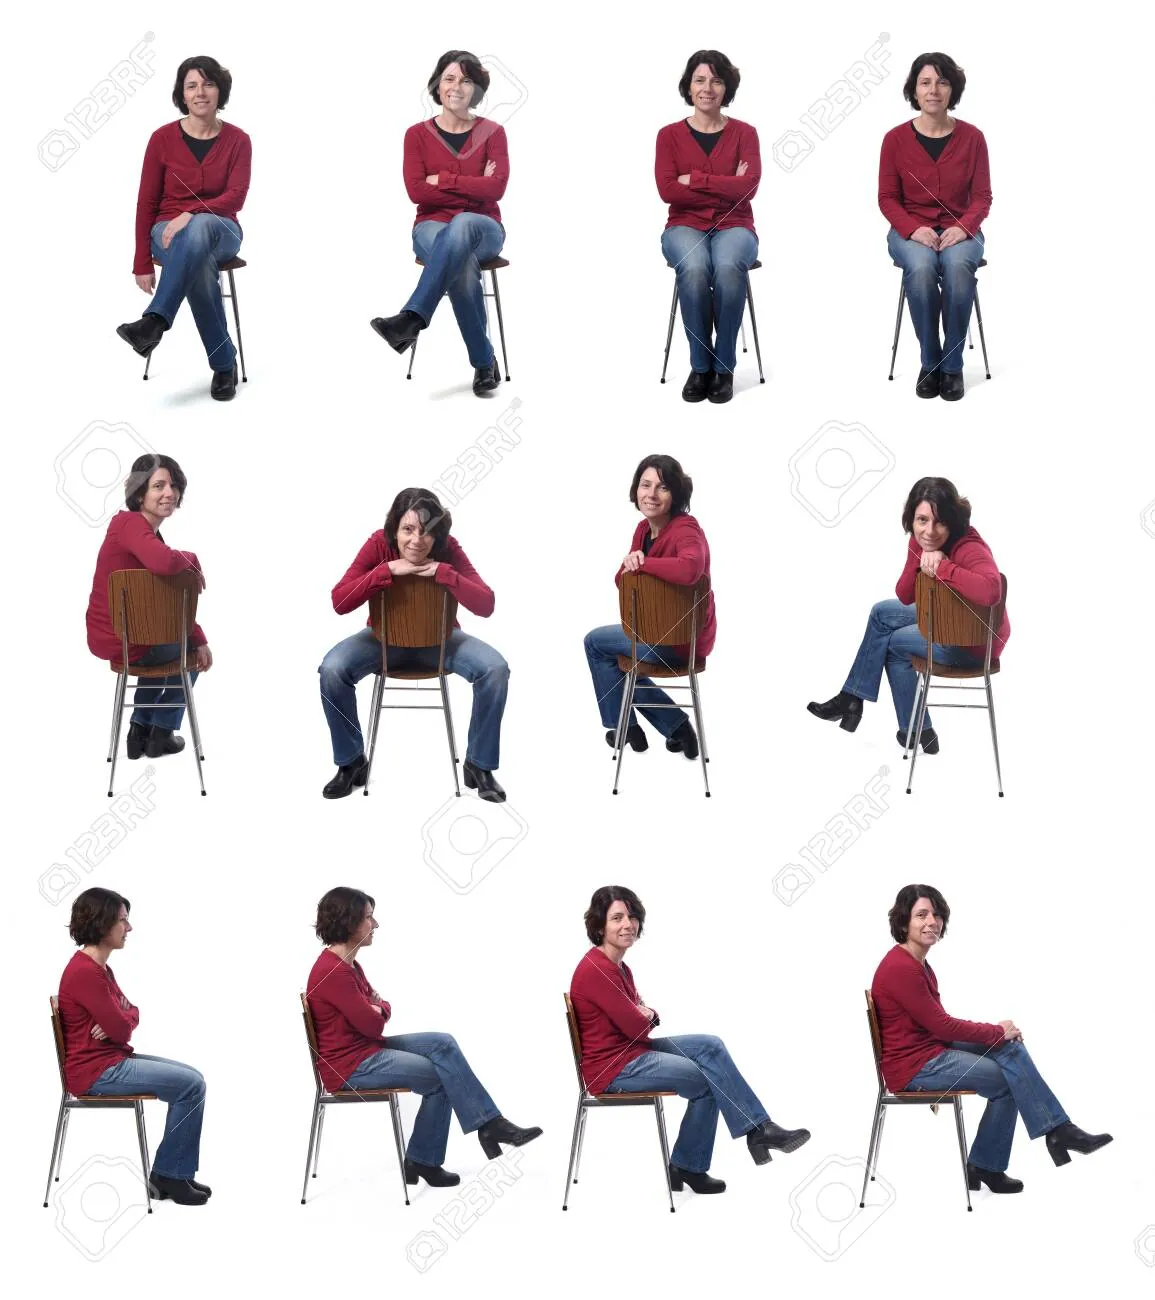
Your arms should never hang dead at your sides. If you’re sitting, use your arms to create geometric shapes. Rest one elbow on a knee or place your hands on the chair’s backrest to create visual interest. If you leave your arms limp, they will appear wider than they actually are due to the pressure against your torso. Always maintain a small gap between your arm and your body to highlight your waistline.
Angles and Body Rotation
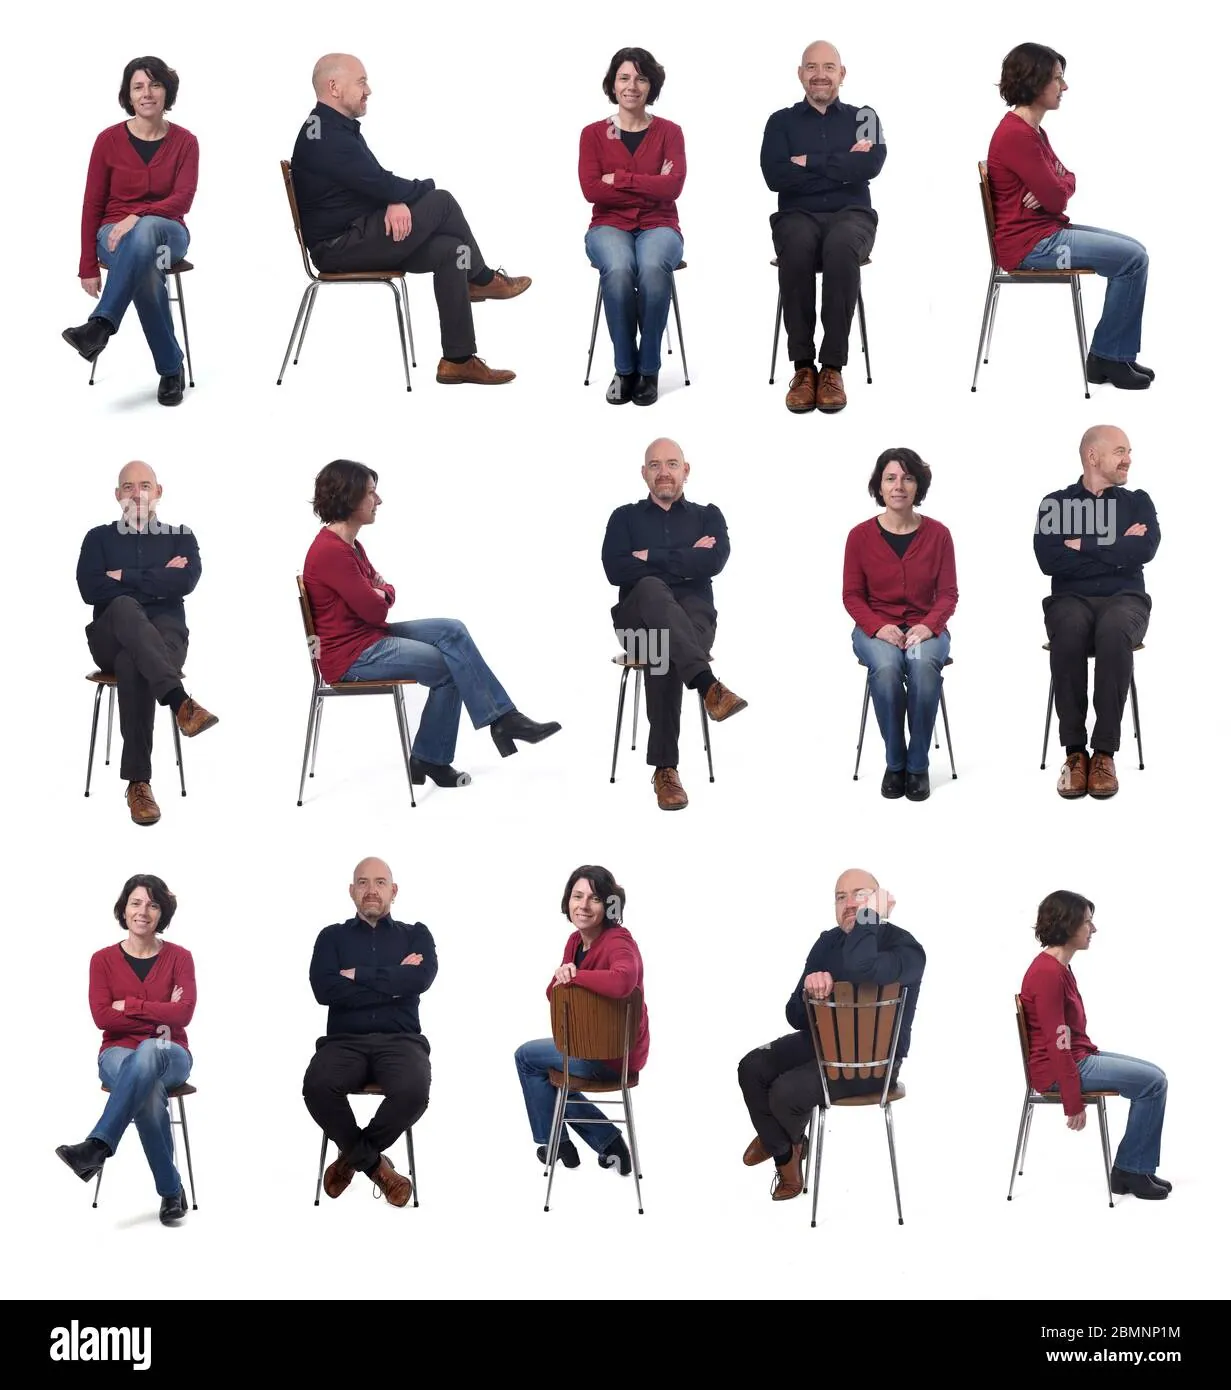
Never face the camera square-on while sitting, as this can make your body look wider. Instead, rotate your torso by roughly 30 to 45 degrees. This simple adjustment forces the camera to capture a profile of your shoulder and hip, which adds depth to the image. Ensure your head position follows the rotation of your chest to keep your neck looking long and graceful.
Should You Cross Your Legs?
Crossing your legs tightly at the knees is generally discouraged in photography because it causes the top leg to squish, making it appear larger. If you want a crossed-leg look, cross your ankles instead. This creates a diagonal line that draws the eye upward. If you must cross your legs, try crossing them at the mid-calf, which preserves the natural contour of your muscles.
Selecting the Right Chair
Not all furniture is created equal for photography. A high-backed chair works well for dramatic, upright portraits, while a low-back stool is superior for casual or high-fashion shots. Avoid chairs with overly busy patterns or textures that might clash with your outfit. A minimalist chair allows the focus to remain entirely on your posture and facial expression rather than the furniture.
| Chair Type | Best Pose Strategy | Ideal Aesthetic |
|---|---|---|
| Wooden Dining Chair | Keep back straight | Vintage or rustic |
| Velvet Armchair | Lean slightly forward | Luxurious or moody |
| Metal Bar Stool | Utilize leg extensions | Edgy or industrial |
| Office Chair | Angle body sideways | Corporate or professional |
Troubleshooting Common Seated Issues
Pro Tip: If your clothes are bunching up at the waist, stand up and smooth your fabric down before sitting back into the pose.
If you find that your face looks distorted, check your chin level. When sitting, people often look slightly downward, which creates a double chin. Instead, push your chin forward and slightly down, a technique often called “the turtle.” This tightens the skin along your jawline and provides a much more defined profile in the final photograph.
Related guides
- 10 Best 4D Full Body Massage Chairs for Deep Tissue Relief
- 10 Best Full Body Massage Chair Options for Every Budget
- 10 Best 3D Zero Gravity Full Body Massage Chairs Reviewed
Frequently Asked Questions
How do I stop looking slouchy?
To avoid a slouchy appearance, imagine a string pulling the crown of your head toward the ceiling. By sitting on the very edge of the chair, you remove the temptation to lean back into the support. This forces your core to activate, which naturally lifts your chest and improves your overall posture for the duration of the shoot.
What should I do with my hands?
Keep your hands active by touching your face, resting them gently on your lap, or gripping the edge of the chair. Avoid hiding your hands behind your back or between your legs. Relaxing your fingers and keeping them slightly apart prevents your hands from looking like stiff, rounded blobs in the frame.
Why do my legs look heavy?
Legs often look heavy when they’re pressed firmly against a chair because the soft tissue spreads out. To combat this, keep your weight on your hips or your feet rather than your thighs. You can also try pointing your toes or lifting your heel slightly off the floor to engage the calf muscles, which adds definition and shape.
Is it better to sit or stand?
Sitting allows for more creative angles and a relaxed, intimate feeling, while standing conveys power and confidence. If you’re sitting, you must work harder to maintain your posture. If you’re standing, you have more control over your center of gravity. Choose your position based on the mood you want to convey in the image.
How do I angle my feet?
Always angle your feet toward the camera or slightly to the side to create a long, unbroken line. If you point your toes directly at the lens, your legs will look foreshortened and stubby. Experiment with pointing your toes like a dancer or placing your weight on the balls of your feet to create a more dynamic, elegant look.
Conclusion
Practice these techniques in front of a full-length mirror to identify which angles highlight your best features before your next session. Focus on keeping your movements fluid and your joints slightly bent to maintain a natural, non-rigid appearance. Once you master the weight distribution on the edge of the seat, you’ll find that posing sitting down becomes a versatile tool in your photography repertoire.